If you know me, I am sure you are aware of my junk obsession. #ibrakeforjunk This is probably one of the things that most drives my husband (whom you will hear me widely refer to as my boyfriend, and yes, who cares what stuff that stirs up in a small town) absolutely crazy!
He. Hates. Junk.
Well, unless it’s HIS junk of course (but we can delve into boyfriend issues in another post!).
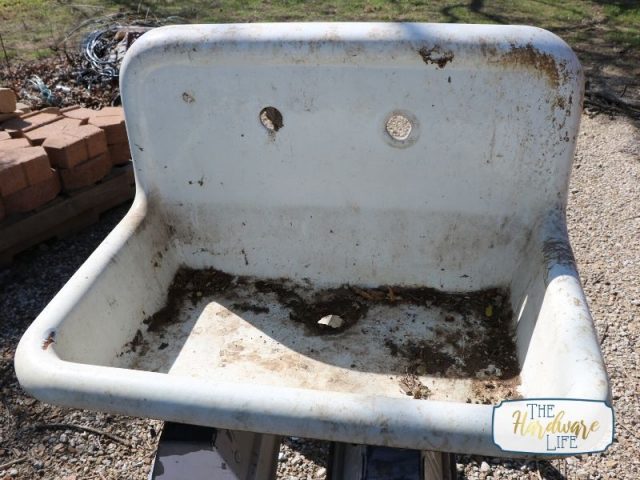
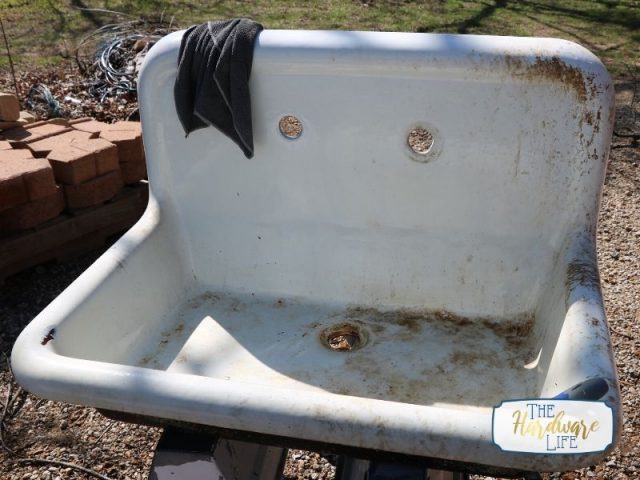
When we bought our current property, we learned that it used to be a Girl Scout Camp in the 1960’s. How cool is that? Needless to say, there were some very cool treasures around. One of them was this antique cast iron sink.
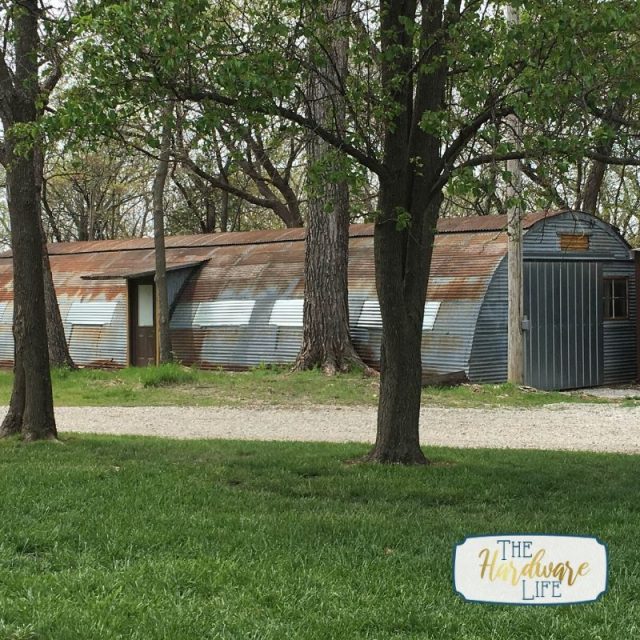
We started renovating a building that was also part of the camp to make a Man Cave (yes, this will be in some future posts — #happyhusbandhappylife) and needed a sink for the bathroom and small kitchen area. Me being the JUNK LOVER that I am, suggested we should just use what we have and the sink was on the list!
One word. Crusty.
Even with our family business being a hardware store, I am still not totally aware of all the products we carry or have access to. Often times I have to pester my wonderful BF (#boyfriend) to help me figure out what fits my ingenious plan.
I was informed of an epoxy product we have on the shelf that was “Easy, Cheap and Fast”. Well, who wouldn’t totally be on board with those things?! (Actually, we keep a few different ones in stock and there are many to order, but I chose this particular one.)
Lovingly, my BF decided this particular ingenious plan would actually save him some money for once, so he brought me home a spray kit of the Homax- Tough as Tile (This product can be found at your local hardware store, but it obviously costs more on Amazon than if you purchase it locally). Thanks, BF!
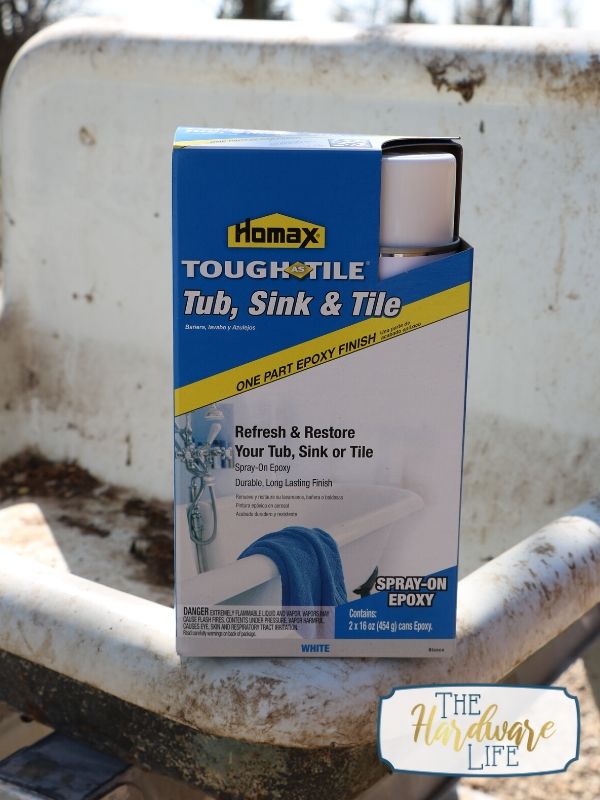
Welcome to Kansas. The day I decided to work on the crusty sink was windy. Epoxy is sticky stuff, and while I can totally dig in dirt and love life on the farm when prepared, I was not in the mood to be covered in it. Back to the store I went — and exchanged it for the brush on kit.
Let’s get back to the “Easy, Cheap and Fast” part. This kit is less than $20 in the local store! Now, I had a paintbrush, scratchy pad and rubber gloves at home. If you don’t, it may add a few dollars to your total. (Obviously, this is a condensed version, I recommend you follow the specific instructions that come with the product you purchase.)
Step 1: Tame the Crust – 10 minutes
I grabbed the hose and my Norwex Enviro {Side Note: I LOVE NORWEX} and proceeded to remove as much crust as I could. This sink has been setting outside for about 10 years. A plastic scraper (oops — sorry for borrowing your stuff BF!) was easy to get the wasp nests. I used a scouring pad to be sure the epoxy would adhere to the surface.
Step 2: Make it Pretty – 20 minutes & dry time
The only precarious part of this entire thing was that the epoxy is like a high-end wine. It needs to be kept during and after at a specific temperature. This meant I had to move it into our shop and keep the heat on (Two words: Kansas. Spring.).
Note: Use a drop cloth to maintain Happy Husband Status.
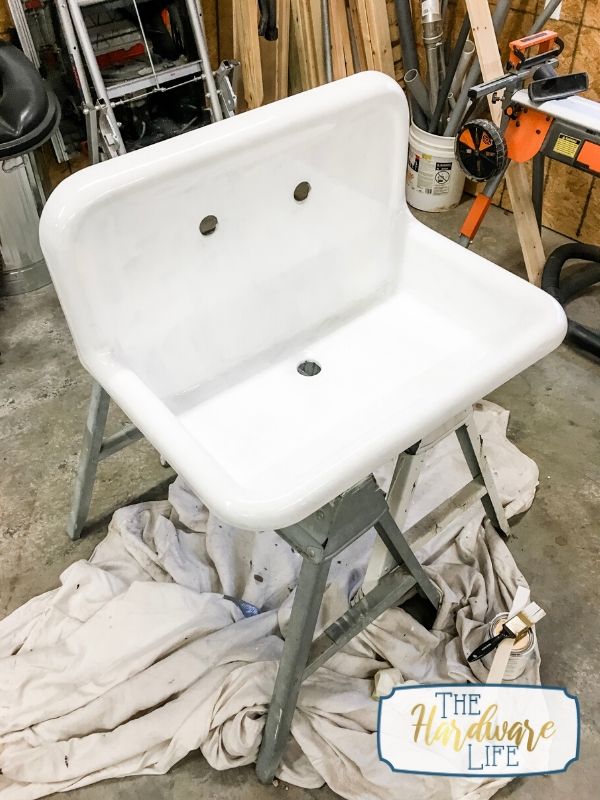
After I was certain it was dry and clean, I got to work painting. It was pretty straight forward. The first coat took about 15 minutes to be sure I had it all even. Coats 2 and 3 didn’t take as long at all.
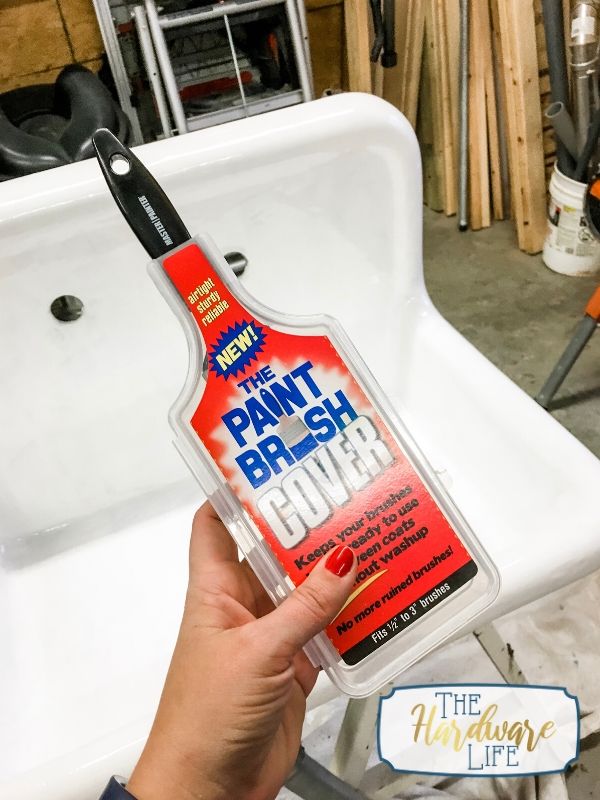
You do have to let it dry for 3 hours before starting on the next coat (Beware: you can’t go longer than 4 or you have to wait a few days to start back again – so carve out time for the entire project BEFORE you start). In between coats, I stored my brush in a handy Paint Brush Cover!

Step 3: Enjoy!
I did 3 coats on this sink and finished it in a day. This particular product works on tile, tubs and all sorts of ugly things you may have around your home! It took 3 days to cure, but it was more than worth it!
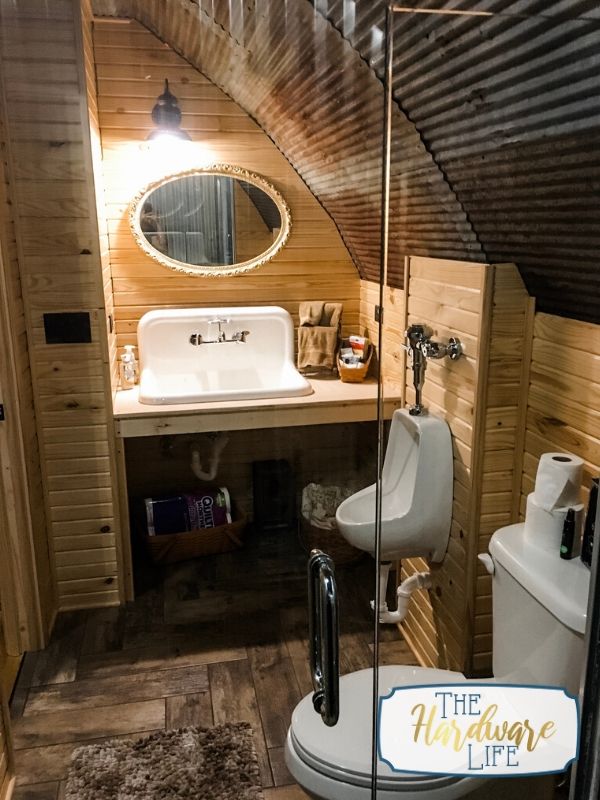
The man cave is mostly done and I can’t wait to share all about it on the blog! Here is a photo of the installed sink mid-construction!