This blog post is written by one of my life characters and good friends, Jill! She is a math teacher, turned tech teaching guru who just moved to the PE department this year to spice things up! Her tech teaching knowledge adds spice to the classroom! Thanks, Jill!
I cannot say it enough, I LOVE GOOGLE! Their suite of productivity tools for education is amazing. Every day I discover something new I can do to simplify routines and make my classroom run efficiently.
One of the coolest things I have done this school year is, create a digital hall pass using a combination of a QR code and a Google form. Posted by the door in my classroom is the code that is linked to a Google form. Students use either the classroom iPad or their own device to scan the code.
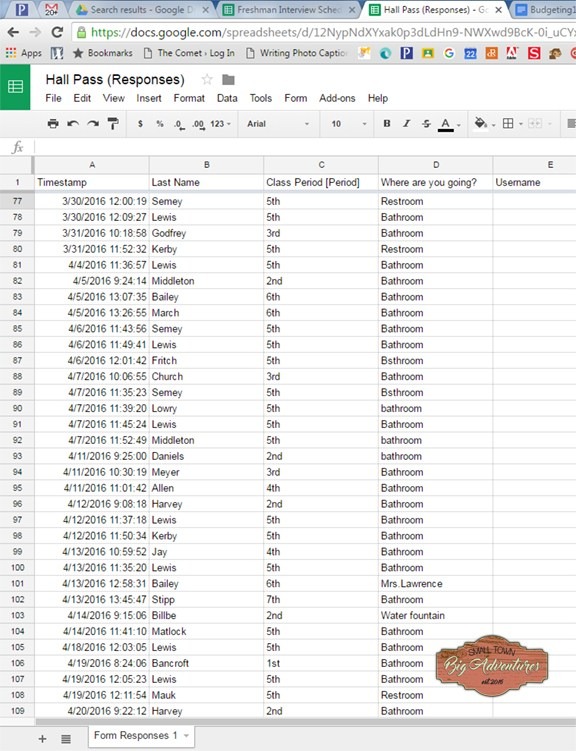
On the Google form I ask 3 questions; what is your last name, what period is it and where are you going. Once they hit submit, their information is stored in a spreadsheet including a timestamp of the date and time they left the room. Every entry for the entire year is on this one Google Sheet. It saves paper, my students think it is cool and it is easy to sort through the data if needed.
If you are interested in learning how follow the steps below.
Start creating your digital hall pass
Step 1
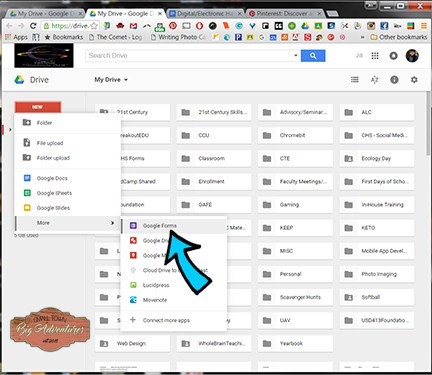
Create your hall pass using Google Forms by clicking on New then got to More then select Google Forms. I like the old version only because I want to use my graphic as a header. In the new version of Google Forms, you can customize the design as well but the space at the top is a lot smaller than the old version. At the top, you have several settings to choose from. To make the process faster, I left all boxes unchecked. Once my school goes 1 to 1, I might rethink this process but for now, it is more efficient if students do not have to log in to their Google accounts to access the hall pass form.
Step 2
Add your questions. For their name and where they are going questions, I used the TEXT box option, and for the class period, I used the GRID option.
Step 3
On the options for the confirmation page, I used the “show link to submit another response”. Some students will most likely use a hall pass more than one time in a school year.
Step 4
Personalize your form by using Photoshop or an online tool to create a header graphic that is specific to your classroom. A couple of online options are PicMonkey and Canva. The size needs to be 500px x 125px. Once you have your graphic, you will need to CLICK the CHANGE THEME button at the top. Each theme has a CUSTOMIZE option. This is where you can change the header image.
Step 5
Once your form is ready, click the button on the top right that says SEND FORM. Here is where you can obtain a link to your form. You will need to copy this so you can create a QR code using a free online QR code generator. I use QR Code Generator.
Step 6
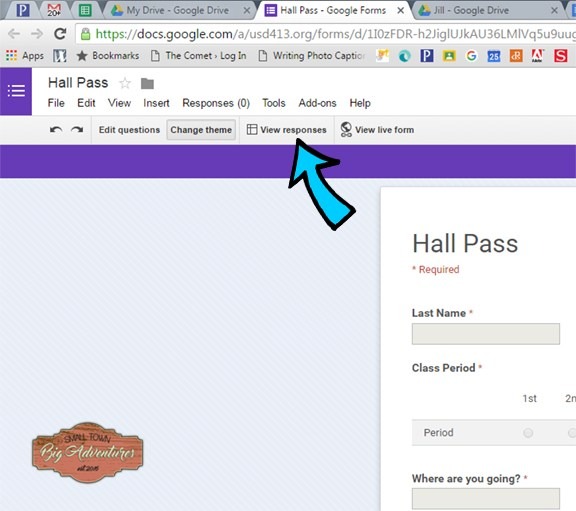
Whoop, whoop! You’re ready to go. Print and hang up your code and let the fun begin! To view the responses to your digital hall pass, go to your form and click the button at the top that says VIEW RESPONSES.


